Security camera installation for small businesses is the practice of planning, mounting, wiring, and configuring surveillance systems to deter theft, monitor activity, and collect admissible evidence. Done right, it gives you real-time visibility into every corner of your property without requiring a large IT team. Whether you run a retail shop in Pittsburgh or a small warehouse on the edge of town, the right setup pays for itself the first time it prevents a loss or resolves a dispute. This guide covers everything from equipment selection to legal compliance, so you can install security cameras for your small business with confidence.
What you need before installing security cameras in your small business
Before you mount a single camera, you need a clear picture of your budget, your layout, and your equipment options. Skipping this step is the most common reason small business owners end up with blind spots, dead zones, and systems they cannot maintain.
Wired vs. wireless: which system fits your business?
The choice between wired and wireless commercial security cameras comes down to reliability versus flexibility. Wired systems using Power over Ethernet (PoE) deliver consistent video quality and do not depend on Wi-Fi signal strength, making them the preferred choice for retail stores, warehouses, and offices with permanent layouts. Wireless systems, like the Wyze Small Business Monitoring Basic kit, offer 24/7 local recording to microSD with no subscription required and Wi-Fi 6 support for reliable connectivity. They work well for leased spaces where running cable through walls is not practical.
| Feature | Wired (PoE) | Wireless (Wi-Fi) |
|---|---|---|
| Video reliability | High, no signal drops | Dependent on Wi-Fi strength |
| Installation complexity | Higher, requires cable runs | Lower, faster setup |
| Best for | Permanent locations, high-security zones | Leased spaces, flexible layouts |
| Ongoing cost | Low after install | May require subscriptions |
| Scalability | Moderate | High |
Equipment checklist and budget planning
A typical small business security system costs around $3,000 upfront, with a range from $1,000 to over $10,000 depending on camera count, storage type, and whether you hire professional installers. That range is wide because a four-camera wireless kit for a small boutique is a very different project from a 16-camera PoE system for a multi-room office. Plan your budget around these core components:
- Cameras: Indoor dome, outdoor bullet, or PTZ (pan-tilt-zoom) depending on coverage needs
- Recording device: Network Video Recorder (NVR) for wired systems or cloud/microSD for wireless
- Cabling: Cat6 or Cat6A for PoE systems
- Mounting hardware: Brackets, junction boxes, and weatherproof housings for outdoor units
- Storage: On-site NVR, cloud subscription, or local microSD cards
Small retail or office spaces typically need 4 to 8 cameras to cover critical areas. That number should come from a site-specific risk assessment, not a packaged bundle. Count your entry points, cash handling areas, and storage zones first, then choose a system that fits those needs.
Pro Tip: If you are renovating or building out a new space, pull your Cat6/Cat6A cable before the walls close. Retrofitting cable afterward can cost 3 to 5 times more than running it during rough-in.
Where and how to position security cameras on your business property
Camera placement determines whether your footage is actually useful. A $500 camera in the wrong spot produces worse evidence than a $150 camera positioned correctly.
Critical areas every small business must cover
Every building entrance and exit is a mandatory coverage zone. Beyond that, prioritize cash registers and POS terminals, stockrooms and inventory areas, parking lots and loading docks, and any transition zones where customers move between public and restricted areas. All building entrances, exits, loading docks, and parking lots require coverage to eliminate blind spots that criminals actively look for before acting.
Mounting height and angle for usable footage
Mount height directly affects whether your footage identifies a person or just shows the top of their head. Entry-point cameras mounted at 7 to 8 feet with a slight downward angle capture usable facial images for identification. Mounting higher than 10 feet reduces facial detail to the point where footage becomes nearly useless in a legal proceeding. For parking lots, position cameras to capture license plates at vehicle entry and exit points, not from the side.
| Location | Recommended height | Angle | Primary goal |
|---|---|---|---|
| Entry/exit doors | 7 to 8 feet | Slightly downward | Facial identification |
| Cash registers | 6 to 7 feet | Facing customer | Transaction capture |
| Parking lot | 8 to 10 feet | Toward entry/exit | License plate capture |
| Stockroom | 7 to 8 feet | Wide angle | Inventory monitoring |
| Loading dock | 8 to 10 feet | Downward sweep | Activity overview |
Avoiding blind spots and staying compliant
Walk your property at the same height as a camera lens before finalizing mount locations. Shelving, signage, and seasonal displays all create obstructions that look obvious in person but get missed on a floor plan. For tamper resistance, mount cameras out of easy reach but not so high that image quality suffers.
On the compliance side, signage that includes the operator name and contact details placed visibly at every monitored entrance reduces legal risk and builds customer trust. Generic "CCTV in operation" signs are not enough. Named operator information signals that your system is managed responsibly, which matters if footage is ever subpoenaed. For a deeper look at compliance best practices as they apply to small business surveillance, Ventisconsulting has covered this in detail.
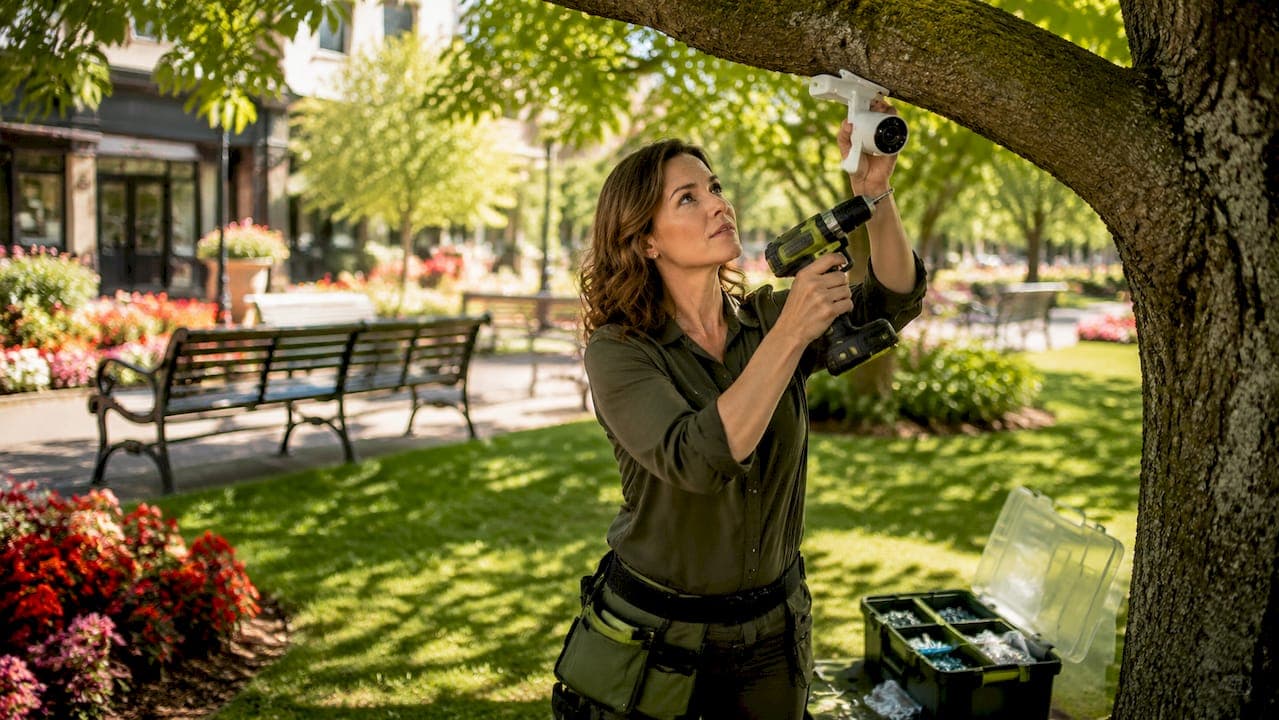
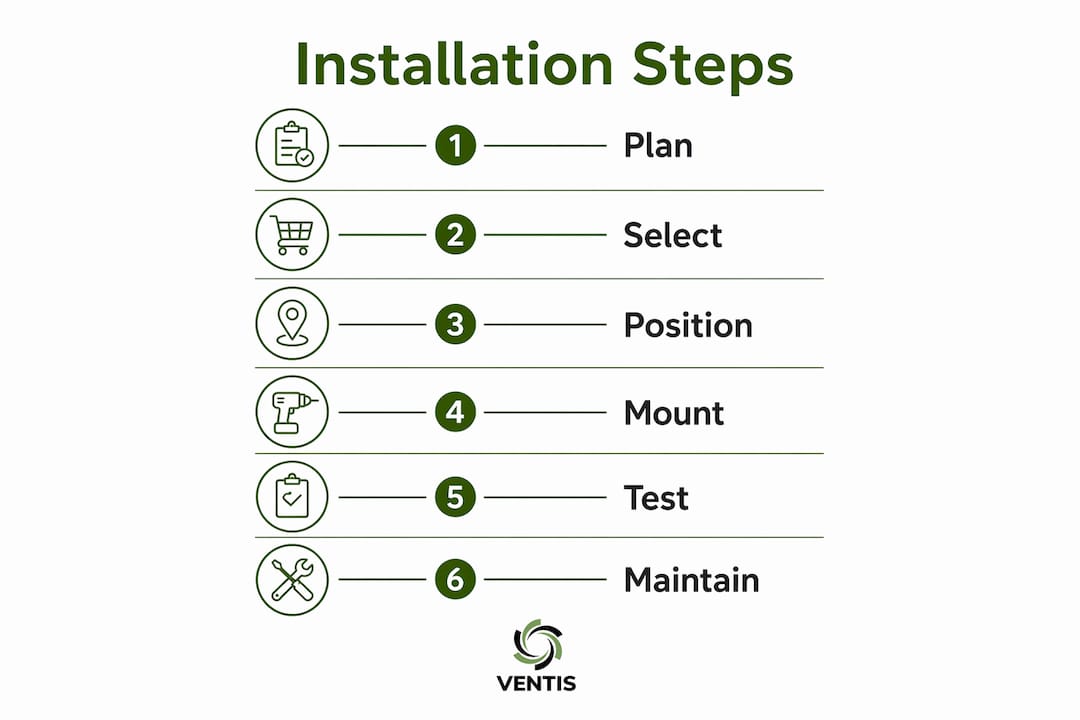
How to install security cameras step by step
With your layout mapped and equipment selected, installation follows a logical sequence. Rushing any step creates problems that are expensive to fix after the fact.
-
Conduct a site survey. Walk the property with your camera placement plan and mark exact mount points with tape. Confirm power sources and network switch locations for PoE systems.
-
Run cable before closing walls. For wired systems, pull Cat6 or Cat6A from each camera location to your NVR or network closet. Coordinating cable runs with your construction schedule is the single biggest cost lever in any security installation.
-
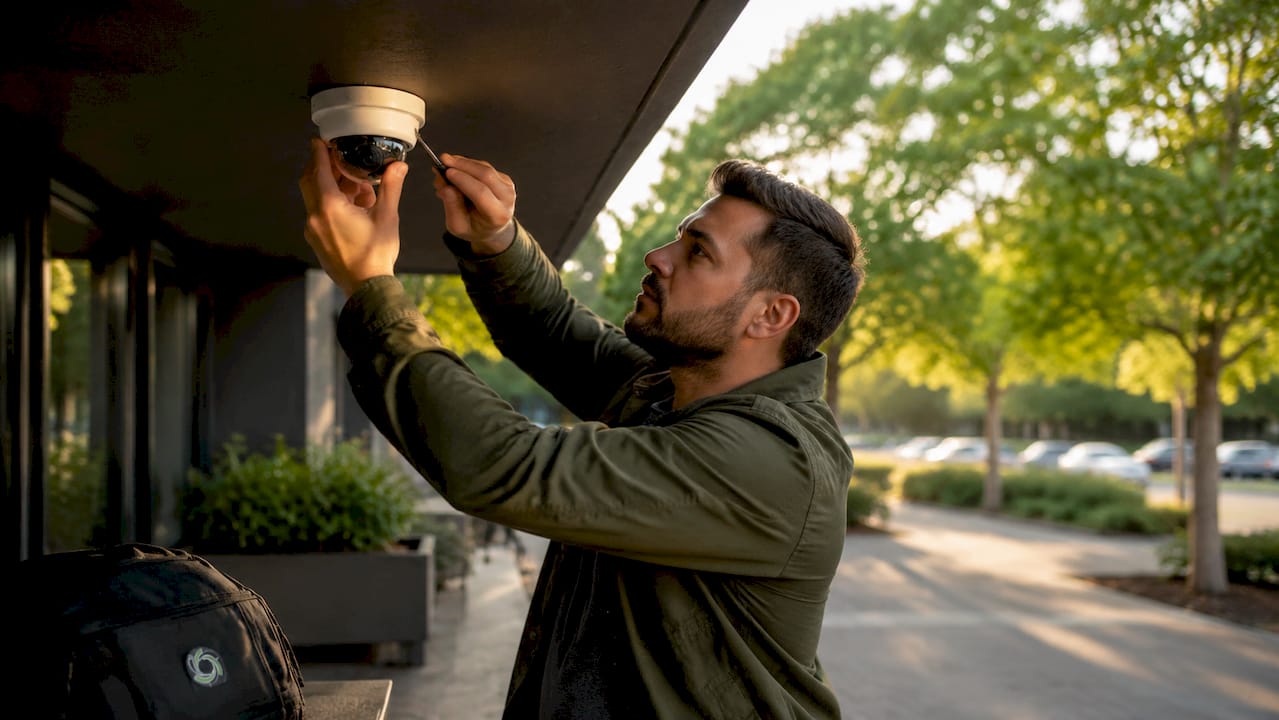
Install mounting hardware. Use junction boxes rated for the environment (indoor vs. outdoor). Secure brackets to studs or masonry anchors, not just drywall. Outdoor mounts need weatherproof housings and sealed cable entry points.
-
Mount and connect cameras. Feed cable through the mount, connect to the camera's PoE port or power input, and secure the camera to the bracket. For wireless cameras, confirm Wi-Fi signal strength at the mount location before finalizing placement.
-
Configure your recording device. Connect your NVR or set up cloud storage. Assign camera names that match your site map (e.g., "Front Door," "Stockroom North") so footage retrieval is fast during an incident.
-
Set up remote access and mobile monitoring. Most commercial security cameras include a mobile app. Configure two-factor authentication on every account. For guidance on securing your camera network, treat your surveillance system like any other networked device.
-
Test every camera. Walk through each coverage zone while watching the live feed. Check night vision, motion detection zones, and recording triggers. Document the final camera positions with photos for your records.
Pro Tip: Label every cable at both ends before the walls close. A simple label maker saves hours of troubleshooting when you need to replace a camera or trace a fault two years from now.
Troubleshooting common installation mistakes
Even well-planned installations run into problems. Knowing what to look for saves you from calling a technician for issues you can fix in 10 minutes.
- Incorrect mount height: Footage showing only the tops of heads means the camera is too high. Remount at 7 to 8 feet for entry points.
- Poor Wi-Fi signal for wireless cameras: A camera that drops connection or records choppy video is usually too far from the access point. Add a Wi-Fi extender or move the camera closer to the router.
- Glare and backlighting: Cameras pointed toward windows or bright light sources wash out the image. Reposition the camera or add a lens hood to block direct light.
- Blind spots from obstructions: Shelving, signage, and columns that were not on your floor plan will block coverage. Re-walk the space after merchandise or furniture is in place.
- Footage integrity failures: Documented chain-of-custody procedures with timestamps and recorded handlers are required to keep evidence admissible. Export footage to a dedicated, access-controlled folder immediately after an incident. Do not leave it on the NVR where it can be overwritten.
"Maintaining chain-of-custody and access controls is as important as initial capture quality to ensure evidence admissibility." — SWGDE Best Practices for Digital Evidence Collection
Professional installation reduces false alarms, improves placement accuracy, and includes ongoing support after the system goes live. DIY saves money upfront but can create hidden long-term costs when cameras are positioned incorrectly or footage fails to hold up in an investigation. For businesses handling cash, high-value inventory, or sensitive client data, professional support is worth the investment. You can also review why businesses need security cameras to build a stronger internal case for the budget.
Key takeaways
Effective small business surveillance depends on correct placement, proper cabling, and documented footage handling far more than on camera brand or price point.
| Point | Details |
|---|---|
| Plan before you buy | Map coverage zones and count cameras based on risk, not bundle size. |
| Cable timing saves money | Pull Cat6/Cat6A during renovations to avoid retrofitting costs 3 to 5 times higher. |
| Mount height determines value | Cameras at 7 to 8 feet with a downward angle produce usable facial identification footage. |
| Signage protects you legally | Display operator name and contact info at every monitored entrance, not just generic alerts. |
| Evidence handling is non-negotiable | Export footage immediately after incidents and maintain documented chain-of-custody records. |
What I've learned from watching small businesses get this wrong
After working with dozens of small businesses on their physical and digital security setups, the pattern I see most often is this: owners spend money on cameras and almost nothing on placement planning. They buy a four-camera kit, mount everything at ceiling height because it looks professional, and end up with footage that shows the back of every shoplifter's head.
The second mistake is treating cabling as an afterthought. I have seen businesses pay more to retrofit cable through finished walls than they spent on the entire camera system. If you are doing any construction or renovation, pull your Cat6A now. The cost difference is not marginal. It is significant.
The third thing most articles skip is evidence integrity. A camera that captures an incident is only half the job. If you cannot produce footage with a clean chain-of-custody record, timestamps intact, and no evidence of tampering, that footage may not hold up when you need it most. Set up a documented export process before an incident happens, not after.
My honest recommendation: if your business handles cash, high-value inventory, or customer data, hire a professional for the initial installation. Use the DIY route for low-stakes areas like break rooms or storage closets. The money you save on professional installation in those zones can fund better cameras in the spots that actually matter.
— Greg
How Ventisconsulting helps small businesses with security camera setup
Ventisconsulting works with small and mid-sized businesses in Pittsburgh and surrounding areas to design, install, and manage security camera systems that actually work. From site surveys and cable planning to NVR configuration and remote monitoring setup, the team handles the technical side so you can focus on running your business. Security camera integration is part of a broader managed IT and security solution that keeps your cameras, network, and data protected under one support umbrella. If you want a system built for your specific layout and risk profile, reach out to Ventisconsulting for a no-pressure consultation.
FAQ
How much does it cost to install security cameras in a small business?
A typical small business security system costs around $3,000 upfront, with a range from $1,000 to over $10,000 depending on camera count, system type, and whether you use professional installation. DIY kits like Wyze reduce upfront costs but may require more time and technical knowledge to configure correctly.
How many cameras does a small business need?
Most small retail stores and office spaces need 4 to 8 cameras to cover entry points, POS areas, and key asset zones. The right number comes from a site-specific risk assessment, not a standard package.
Where should security cameras be placed in a small business?
Cameras should cover all entry and exit points, cash registers, stockrooms, parking lots, and transition zones. Mount entry cameras at 7 to 8 feet with a slight downward angle to capture usable facial images.
Do I need signs if I install security cameras in my business?
Signage is a legal and practical requirement. Signs should identify that surveillance is in operation, name the operator, and include contact details. Place them visibly at every monitored entrance.
Should I hire a professional or install cameras myself?
Professional installation improves placement accuracy, reduces false alarms, and includes post-installation support. DIY is a reasonable option for low-risk areas, but high-traffic or high-value zones benefit from expert setup to avoid costly mistakes.